Category

Tutorials

Learn how to make incredible effects in Final Cut Pro from our easy to follow tutorials.

Top 5 Secrets To Get The Most Out of Final Cut Pro X

By Tutorials 7 Comments

Want to get more out of Final Cut Pro? These tips will help improve your editing workflow and allow you to make better videos with Final Cut Pro.

1: Export ProRes 422 –> Handbrake For Quick, High Quality Videos

Step One

From the Final Cut Pro X Export Screen, select  Apple ProRes 422. (422 has a target data rate of 145 Mbps, so is very high quality)

prores
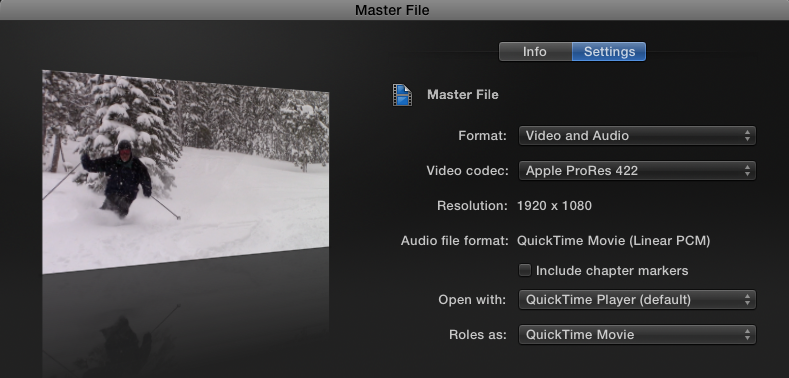
For my 3-minute video that was HD 1080p 60fps, this took only about 30 seconds.

file-size
As you can see, my only 3-minute video is over 2GB! The point of the first step is to quickly get the video out of Final Cut. Now to step two.

Step Two

Download Handbrake Here: http://handbrake.fr if you don’t already have it. (It’s free)

Handbrake uses x264 to convert to h.264 quickly and efficiently. Open up Handbrake, and select your 422 video from step one. Below are the settings that I have chosen. Since I’m uploading this video to Youtube, I’ve checked the “Web Optimized” button. The only other setting you should need to worry about is the slider with the red circle around it— this determines the amount of compression. (More compression= smaller file size and less quality) Once you’re ready, just click start.

handbrake-2
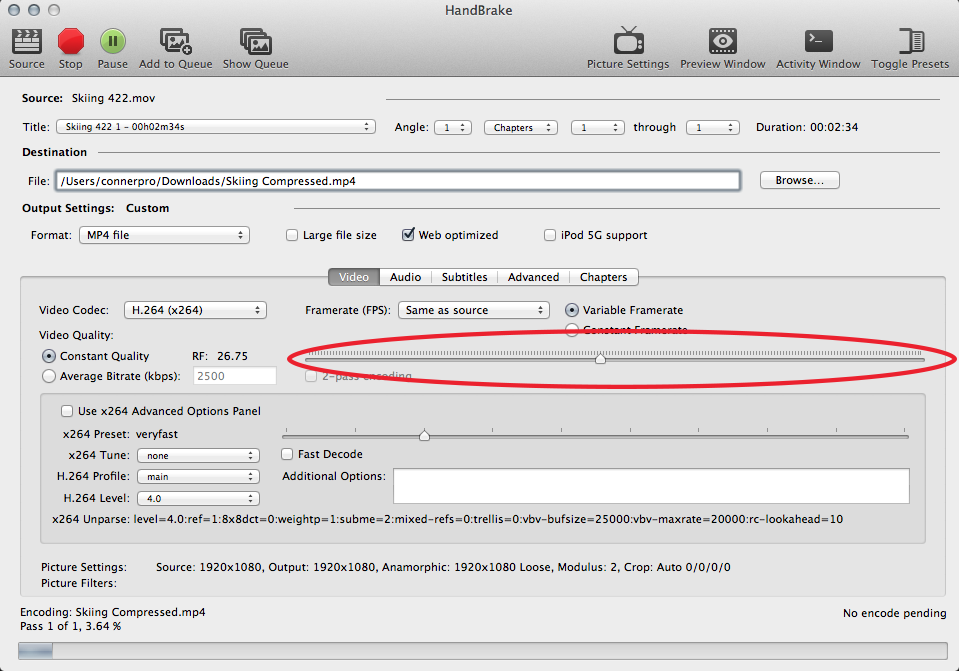
For my 3-minute video, this process took only about 1 minute on my iMac. Here’s the final result:

compressed version
Not bad! 80.5 MB, and it still looks great. A lot of people prefer using Apple Compressor, but this method is easier in my opinion, and you don’t have to drop $50 for Compressor.

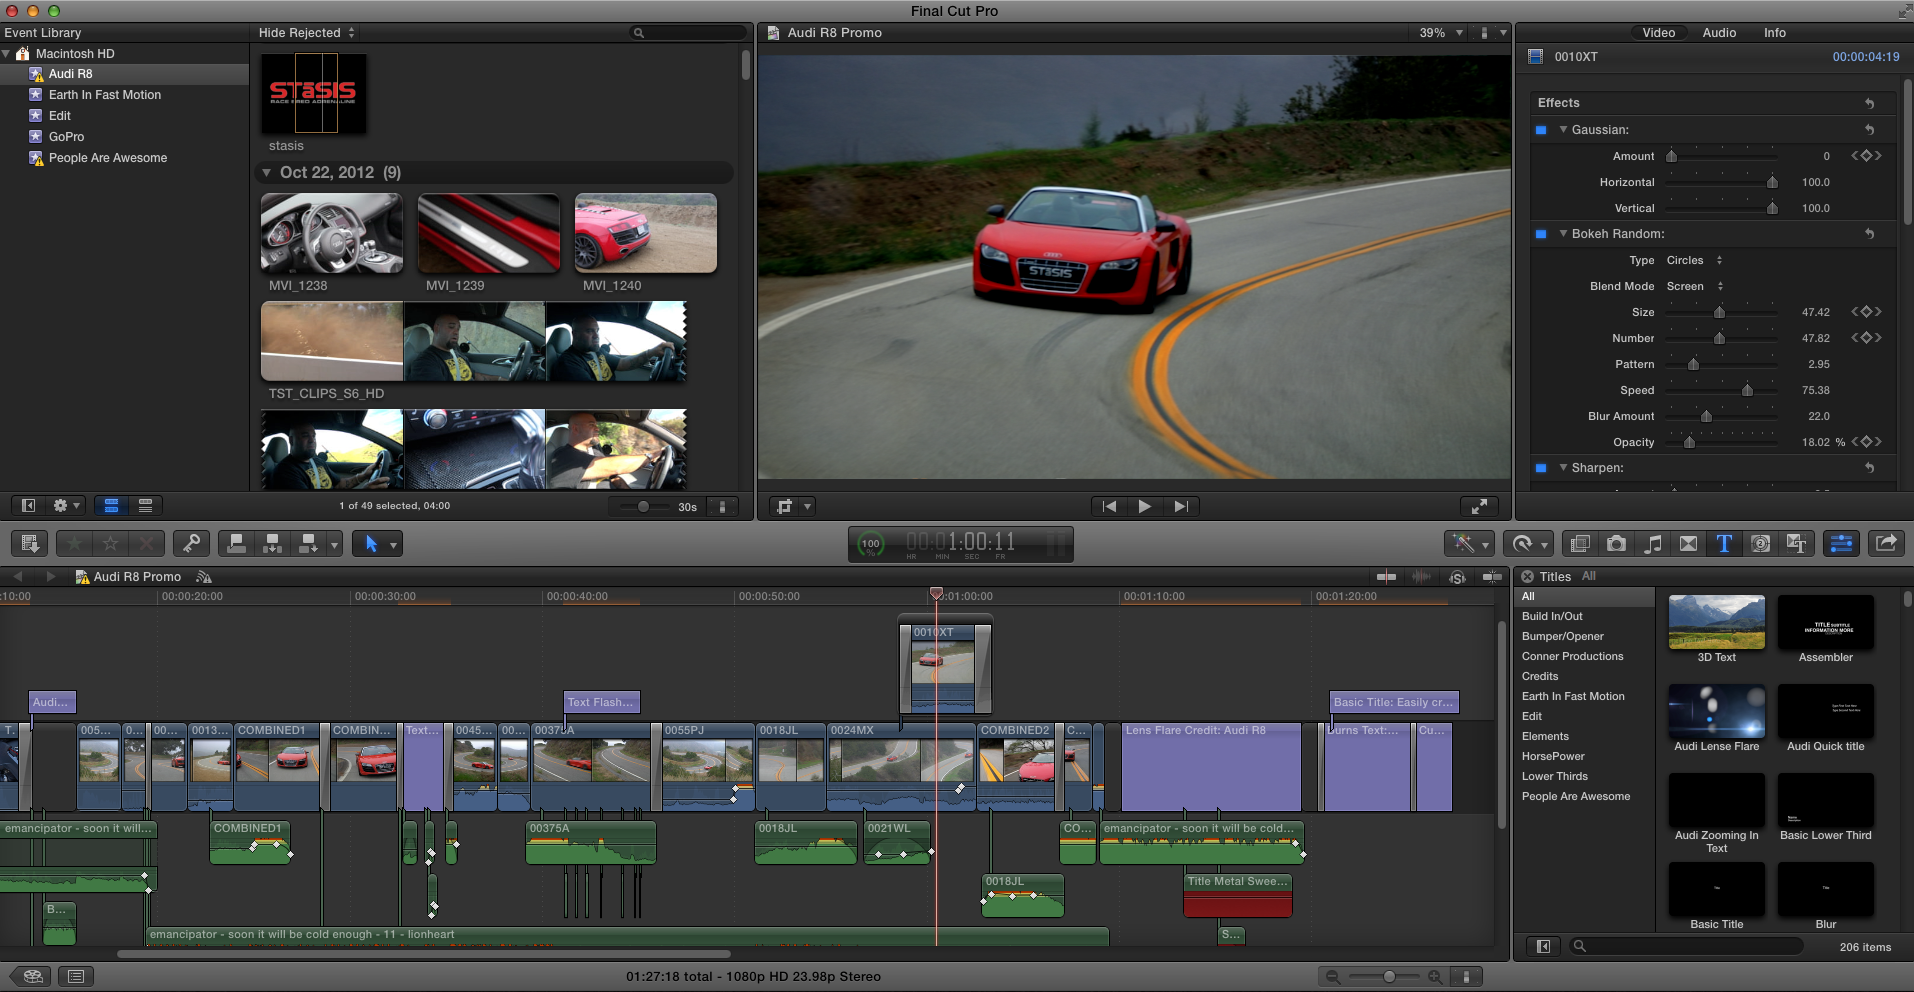
2: Simplify Your Timeline By Creating Compound Clips

Sometimes the timeline gets so complex with so many clips, titles, and audio that it’s just overwhelming. The solution? Bring clips together using compound clips. Here’s how:

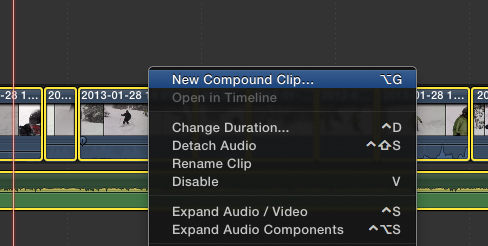
Select all the clips you would like to combine, right click, then choose “New Compound Clip…”
create-compound-clip

Give it a name, then click Okay. Now, you have one clip to simplify your timeline. Breathe a sigh of relief.

compound-clip

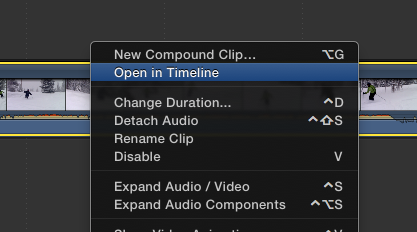
Need to go back and change something in the Compound Clip? Easy. Just right click on the Compound Clip, then choose “Open in Timeline” and you can go back and make changes to individual sub-clips.

back-to-fcpx-timeline

3: Save space By Deleting Render Files

Final Cut Pro X eats up space. When you’re done working on a project, save space by deleting render files.

Delete Project Render Files

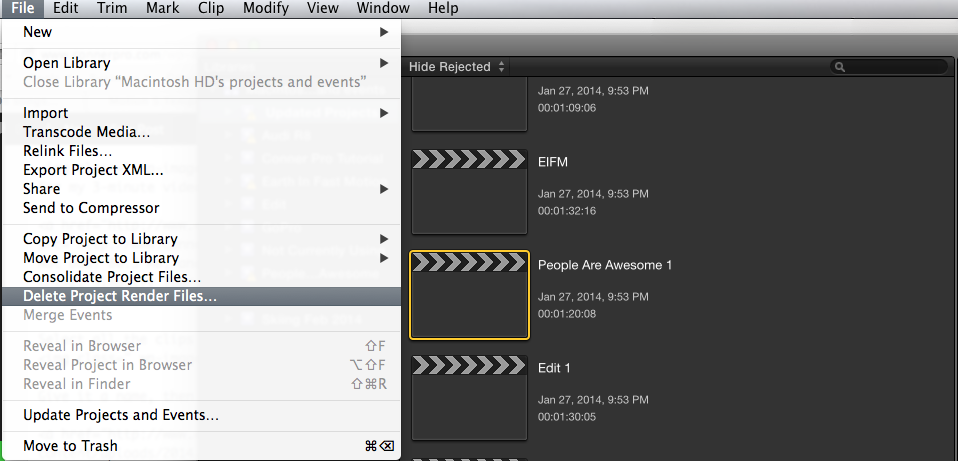
Open up the Project Library, then select the Project who’s render files you want to delete. Then go to “File” –> “Delete Project Render Files…” Then choose Okay.

delete-project-render-files

Delete Event Render Files

Just like deleting Project Render Files. Open up the Event Library, then select the Event who’s render files you want to delete. Then go to “File” –> “Delete Event Render Files…” Then select which files to delete.

delete-event-render-files

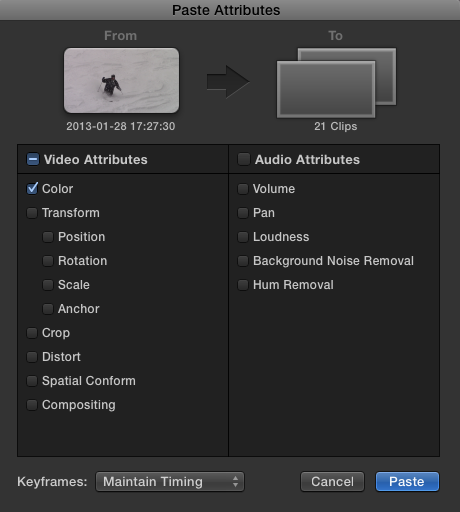
4: Copy Effects To Multiple Clips

This allows you to copy any attributes/effects from one clip to others. This is particularly useful if you’re doing color correction within Final Cut, and wish to copy the color effects to multiple clips. Here’s how: Select the clip in the timeline with the effects/attributes you wish to copy, then press Command-C to copy it. Then, select all of the clips in the timeline you want to add it to, then choose “Edit” –> “Paste Attributes…”

paste-attributes

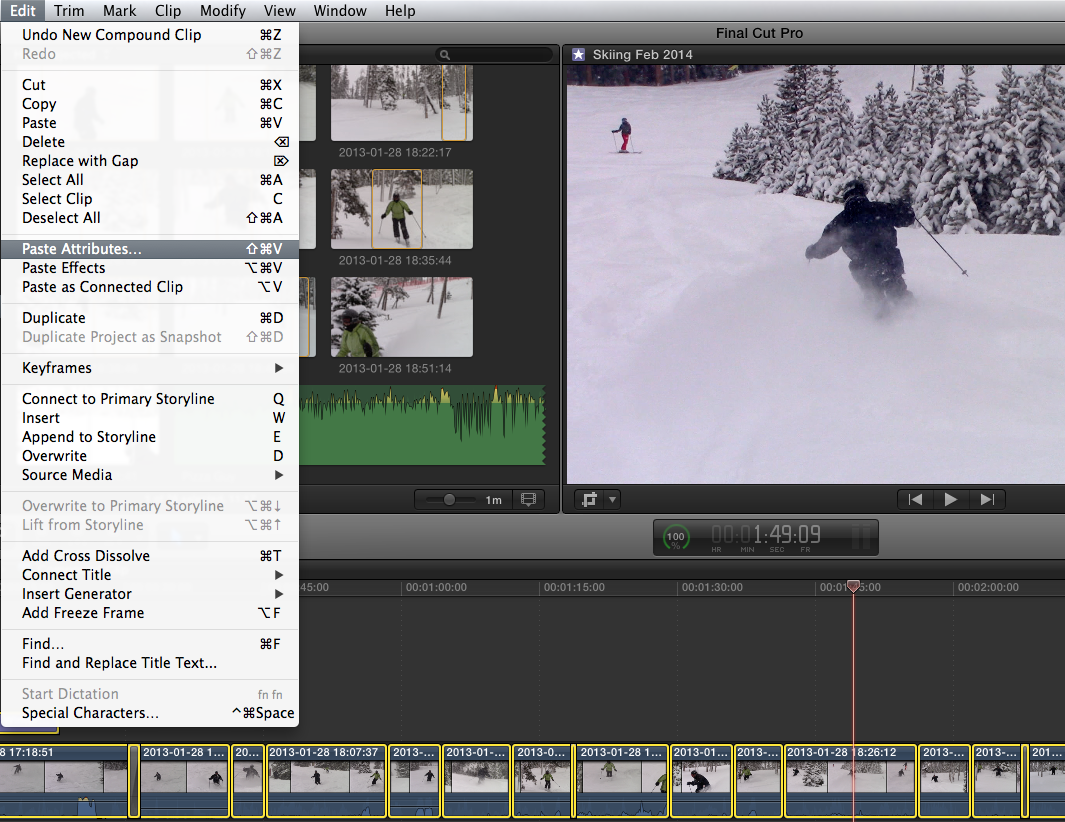
From there, you can select which attributes you would like to copy. As you can see below, I’ve checked “Color” to copy my Color adjustments to the other clips. Then just click Paste!

paste-attributes-options

Use Professional Final Cut Pro X Templates

Using Professional FCP X Templates is one of the best ways to easily unleash the power of Final Cut Pro. An entire community has developed around Final Cut providing tons of incredible free and premium Final Cut Templates. They’re easy to implement, and look great.

Free Templates

We’d love for you to check out our Free Templates collection here: https://www.connerpro.com/category/blog/free-effects/

Premium Beat has a nice list of free templates here: http://www.premiumbeat.com/blog/the-big-list-free-fcpx-effects-filters-and-templates/

Zach King has a few free effects here: http://finalcutking.com/plugins-templates/

FCP.co has an awesome collection of free FCP X Templates from a variety of sources, along with helpful tutorials.

Pro FCP X Templates

Feel free to take a look at our Premium Templates here: https://www.connerpro.com/templates/

Check out Apple’s collection of Premium FCP X Templates: http://www.apple.com/final-cut-pro/resources/plugins.html#effects

The FCP X Techniques section on Creative Cow: http://forums.creativecow.net/fcpxtechnique is a great way to get help and learn new things about Final Cut Pro X.


We hope you found these 5 tips useful! Let us know what you think in the comments section below, and be sure and leave us your best tips.

Top Ten Video Editing Tips To Make Your Video Look Good

By Blog, Tutorials No Comments

While there are a million tips for video post production, we decided to consolidate 10 that would make the most difference. While these may not completely revolutionize your  videos, they will help remove the amateurish look that is so prevalent in videos today, stunting the viewing experience with bad editing.

1: Simple Is Better

There’s a time and a place for complex Motion Graphics. Rather than finding the most complex, crazy looking graphics and titles for your video, sometimes just a simple stationary title is better. If you find an effect that looks great, then by all means use it, however obnoxious graphics that try to make the video “cooler,” actually end up detracting from the video itself.

fcpx

Final Cut Pro X Example Project

2: Limit Fancy Transitions

Almost every video editing system is loaded with swirls, page wipes, exploding circles, spins and more. Please, please, refrain from using these habitually. They may fit the tone of the video once in a while, but repetitive use of them is just distracting and amateurish. Using cuts is more professional, less distracting and helps direct the viewer through the video. Fades are common, but make sure that you use them sparingly.

3: Keep The Best Quality You Can

We know you’re not always getting the best quality of video to work with, but it’s important that you make the most out of what you have. While it always depends on your purpose and format medium, try to keep the best quality as you can by compressing the absolute minimum. The lower the quality, the less enjoyable; you want people to be impressed with your video, not have to squint to see it.

4: Change Up The Camera Angle

While filming, it’s important to get as many shots as you can from a variety of angles. When editing the video, be sure to have a natural looking rotation of camera angles. Nothing looks worse than 30 different shots all from the same angle. Even if you only have two angles to choose from, try to mix them together (creatively) to add some variety.

fcpx-transition

Final Cut Pro Example Cut

5: Use Color Correction

A lot of amateur video makers completely ignore Color Correction. It has the ability to create a mood, to add a feel to your video that makes it unique and stand out. Make sure that this correction is completely uniform throughout all of your shots. Also, be sure to not “overdo it.”

6: Match It To The Music

Give the music and video some relationship, so it doesn’t look like you just slapped on a random song. Try putting cuts on beat drops and integrating unique characteristics of the song with certain types of clips. For instance, maybe a slow part to the song features some slow motion clips. It will be different in every case, but do your best to have the music compliment and add to what’s happening visually.

7: Remove Camera Noises (If You Have Any)

Absolutely nothing sounds more unprofessional than hearing clicks or other noises from the camera. Seriously. Remove that stuff, it’s annoying and something that easily fixed.

8: Mix It Up A Bit

Try making unique cuts and play with the length and arrangement of clips. It might not always work, but breaking patterns is a great way to captivate your audience.

9: Stop Shaky Video!

A little shake is completely fine, even desirable sometimes. However, if it’s too shaky, either try to fix it (stabilization) or trash it if it’s too much. Video that’s too shaky looks bad and can make some people seasick and is an instant turnoff.

10: Look Around For Inspiration

Lot’s of people have videos or producers they look up too. Look around in movies, commercials, Youtube videos and more for ideas. Maybe you saw a Youtube video with a cool sequencing of clips that you would like to try. Be creative, and <cliché the sky’s the limit!</cliché>


What it comes down to, is do what’s best for your video. You might even have to break some of these rules, but if you follow them, it will help make your video more like the pros. Feel free to leave a comment if you have any questions.

Motion Tutorial: Video “Slicing Effect” (Final Cut Effect)

By Blog, Tutorials No Comments

I decided to create this tutorial to show a cool looking effect for Motion. With lack of a better name, I called it “Slicing Effect,” where basically what’s happening is a drop zone is taken and made to look like lots of small “slices” are making it appear. It’s by no means a groundbreaking effect, but a fun one to know how to do. Here’s a video to show the final effect. This particular effect doesn’t look that great, but this Final Cut Effect is just a sample and has some incredible potential.

[embed_youtube src=”https://www.youtube.com/embed/OucpTBNepuQ” width=”700″ height=”394″ class=”youtube_styleme” id=”thisid”]
Song is “Friend” by “Blackmill.” Video Courtesy of Red Bull Content Pool: https://www.redbullcontentpool.com/content/international/products/web_clip_clean_bobby_brown

Step 1: Open A Motion Project and Create A New Drop Zone

Go to “Object” on the menu, then choose “New Drop Zone.”

Step 2: Create A Clone of the Drop Zone

Right click on the Drop Zone, and choose “Make Clone layer.”

Step 3: Create A Rectangle

It doesn’t have to be perfect, but make it about that shape and size. (Use the Rectangle Tool for this) This is the basis for what is to put into the Replicator to create the effect.

Step 4: Create A Replicator

Select the Rectangle we created, then click the “Create Replicator” button. (I’ve uploaded high-res images, so you can click and view the full image if you’re having trouble seeing). As for now, there’s 9 points in our Replicator, which has a size of 1276. Give your Replicator similar settings.

Step 5: Add Image Mask of Replicator To Drop Zone Clone

This is going to make our Replicator the source for the mask that we’re going to apply to our cloned Drop Zone.

Right click on the Clone Layer we just created, and choose Add Image Mask.

Then, change the Mask Source by dragging the Replicator we made into the Mask Source Box. This is making the Replicator the source of the mask for our Drop Zone. Above, you can see my Replicator in the Mask Source box.


At this point, your Canvas should look something like this. If it doesn’t, go back to Step 4 to make sure that your Replicator is set up correctly. Keep in mind that based on the random seed, your rectangles should appear at slightly different locations. I will attach the actual project file at the end that you can download and look at if you’re having trouble getting it to work.

Step 6: Create The Fly In

With the Replicator selected, I’ve created these keyframes. This will make the effect start large, filling the screen at the beginning, then shrinking down slightly. What we’re adjusting is the width and height of the bounds, which is basically the boundaries, inside of which all of our rectangles exist. So, the larger the bounds, the more spread out the rectangles will be, and the smaller the more packed together they will be. The keyframes above make the bounds go from big to small, creating a “fly-in” effect.

Step 7: Add a Gaussian Blur to the White Rectangle

Under Library, Filters, then Blurs, find the Gaussian blur and apply it to the white rectangle (not the replicator). Change the amount to 24.

Step 8: Randomize the Gaussian Blur

Add the “Randomize” parameter behavior to the amount of blur. Once you’ve applied the Randomize Blur, make it match the settings below. The animation window on the bottom right shows the variance in Blur. Make sure that you choose “Add and Subtract” under apply mode and change Amount to 11, Frequency to one or two, and turn Noisiness down. This will give the rectangles a natural looking blur.

Next, create a Keyframe on top of the “Randomness” to make it very blurry at the beginning when everything is flying in, then even it off. (Double click in the Animation Window to create a new keyframe) It should look like the image below.

Step 9: Create The Flyout

This is a continuation of Step 6. I have the original fly-in, the hold (the middle part) and the fly out (the last part where the width and height decrease). The orange and yellow are the width and height of the bounds of the Replicator, respectively. They represent the width and height of the area in which all of the rectangles reside.

Next, we have to change the size of the whole Replicator layer, its location and rotation as it flies out. Select your Replicator in the Layers Panel, then make the following adjustments. The light blue line (Size) decreases towards the end as the whole effect flies out, because it gets smaller. The X Position of the Replicator (Light Green Line) increases, because when it flies out, it moves slightly to the right. It also rotates (Pink Line) a little bit as it flies out.

Next, we have to move the drop zone along with the Replicator, so they can still see the Drop Zone as it’s moving out. In other words, we want our Drop Zones and our Replicators moving out together.

With the cloned drop zone selected, we’re basically mimicking what we did in the last photo, but this time we’re editing the Drop Zone. This way, the drop zone will move with Replicator as it moves out. Just like the Replicator, the X Location is Increasing (moving to the right), the Size is decreasing and it’s rotatingslightly.

Step 10: Duplicate

At this point, there aren’t quite enough rectangles to be able to see most of the Drop Zone. In order to be able to view more of the Drop Zone, I could simply increase the number of points in the first Replicator, which would add more rectangles, thus making the Drop Zone more visible. However, to make it look more organic, let’s duplicate the whole effect, then change some settings on the second one to make it slightly different. To do this, select both the cloned Drop Zone and the Replicator, and duplicate them. It helps to put them in a new folder to stay organized. (For example, in the folder”1st Part,” I could have the 1st Replicator and the 1st Drop zone. In the folder “2nd Part,” I could have the 2nd Replicator and the 2nd Drop Zone)

Here is what your Layers Panel could look like.

Below are the settings I chose for the duplicated Replicator. As you can see, I’ve changed a lot of the settings, such as the scale randomness, the scale and the number points. This will make it slightly different than the first one, which will help it fill in some of the gaps.

Step 11: Finishing Touches

We’re almost done! Let’s add a fade in and fade out:

Adding a fade in and out makes it look a little smoother. Add a FadeIn/Fade Out to your Cloned Drop Zones.

Let’s also change all of the keyframes we can to Bezier. It makes all of your animations less abrupt, and smoother looking. You can do it to whatever keyframes you like; just select the ones you want, right click, and under Interpolation, choose Bezier.

That’s it! If there’s something you missed or didn’t understand, feel free to ask us in the comments section below. Below is also a download link for the project file for you to take a look at. Feel free to use it as a Final Cut Effect or for whatever you want. I tried to simplify as much as possible for the tutorial, so there’s a few extra elements to look at, should you decide to download. Enjoy!

Download Motion Project